

I decided to post this write up for those that would like to install OEM Fog Lights on the 2011-2012 WRX/STI. This is my 1st DIY Thread ever and it probably shows. This Job will take an average DIY'er 1 hour to 1 hour and 30min. As with most car projects be sure to unplug the car battery. (I didn't)
Here's the kit shown in ISM. Relay and Replacement Turn Signal Dimmer Switch already were installed when I took this pic.
![Image]()
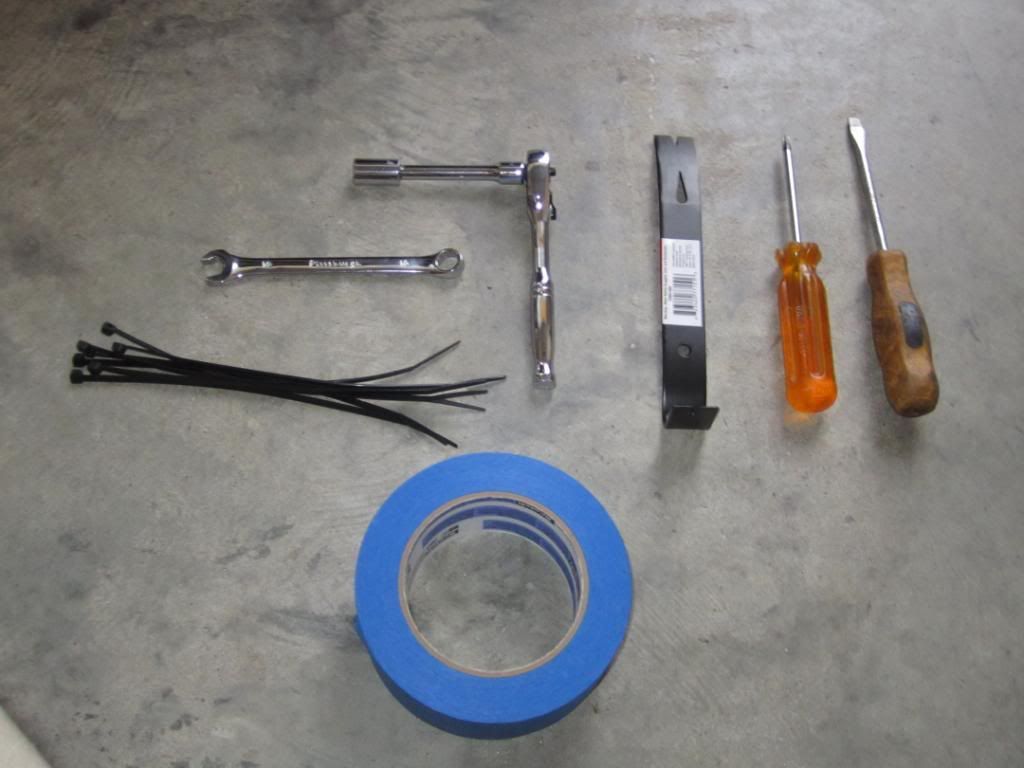
Here's the tools needed, Phillips, 10mm socket and something to remove plastic fasteners on weather guard are a must, rest is up to you and I added the blue masking tape.
![Image]()
-Part 1- Turn Signal Switch Removal/Installation
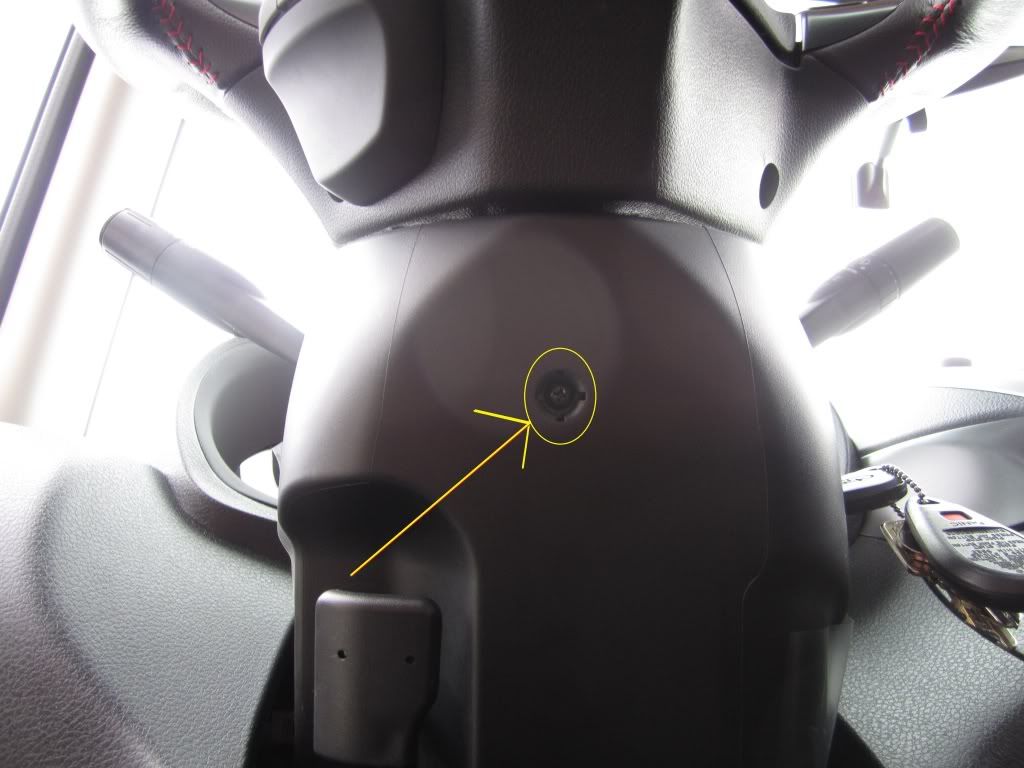
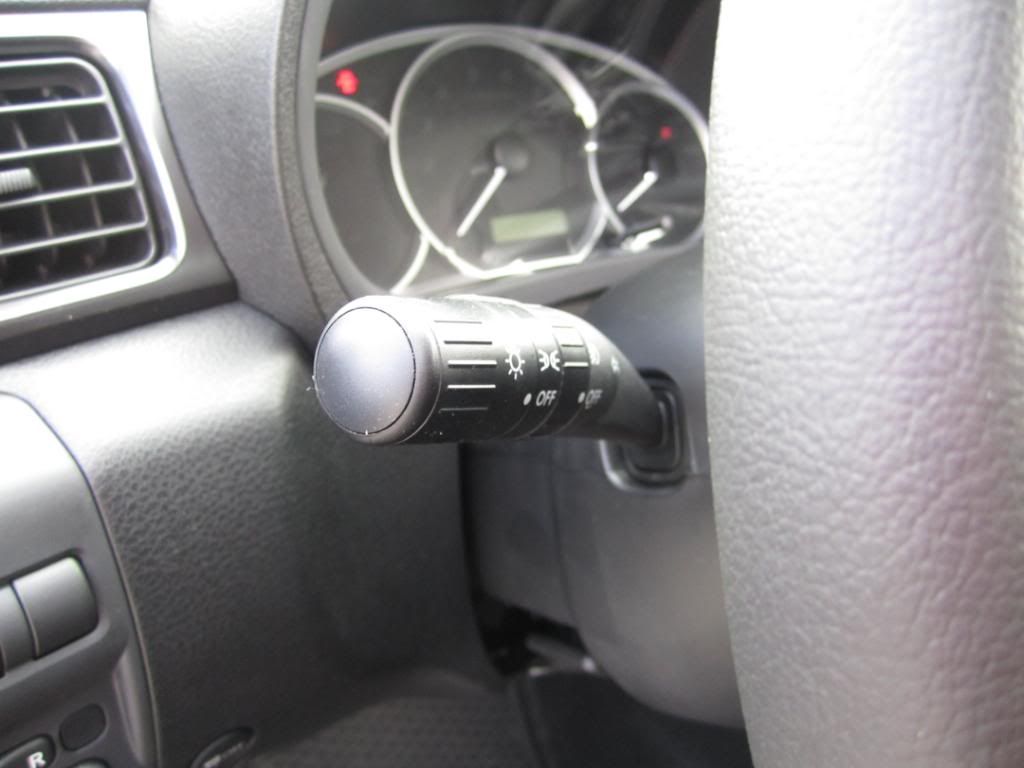
1. Remove this screw then remove bottom steering hub cover.
![Image]()
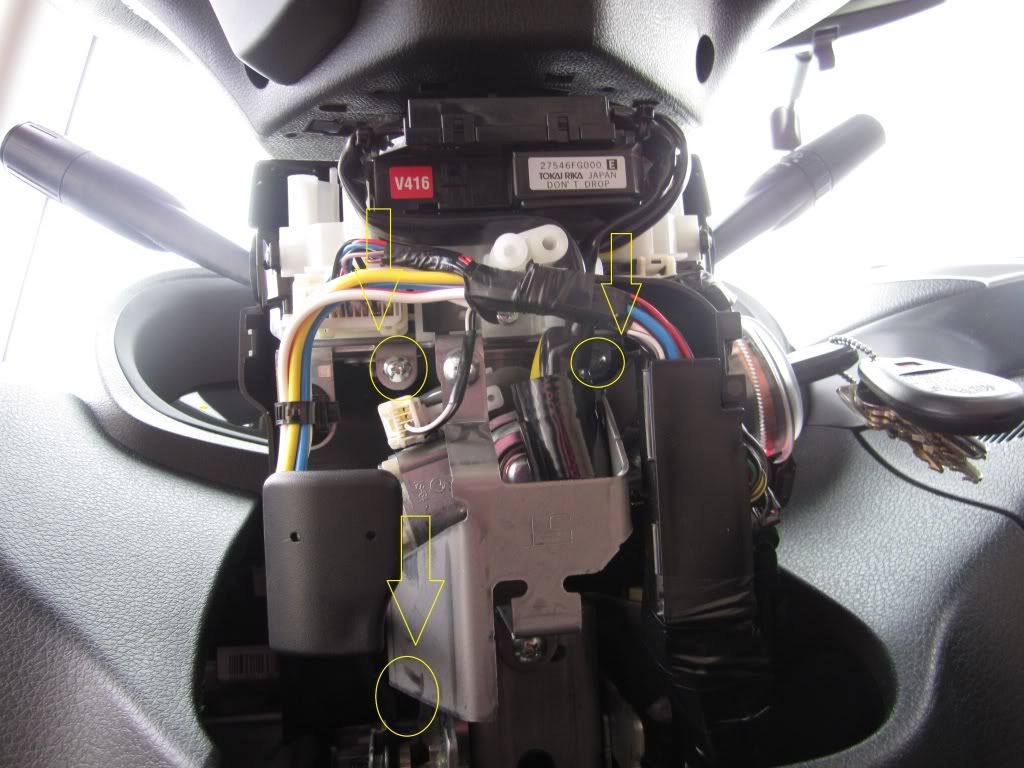
2. Remove these 3 screws (3rd shown in 2nd pic) so you can move the top hub cover out of the way.
![Image]()
![Image]()
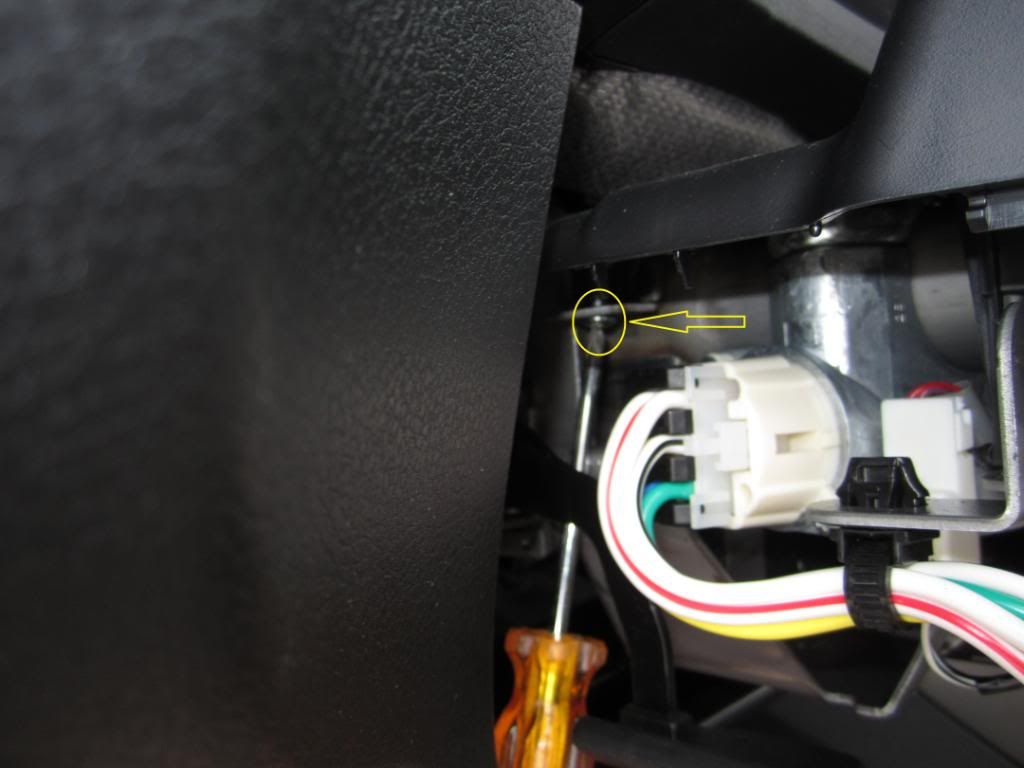
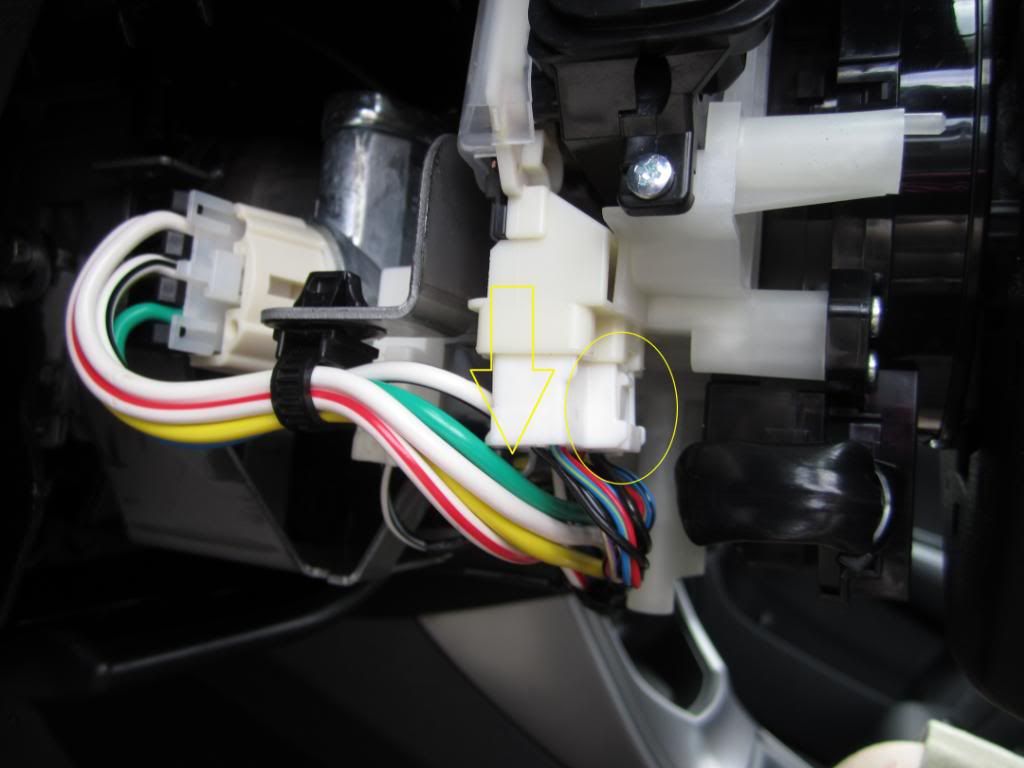
3. Remove this plug from original turn signal switch.
![Image]()
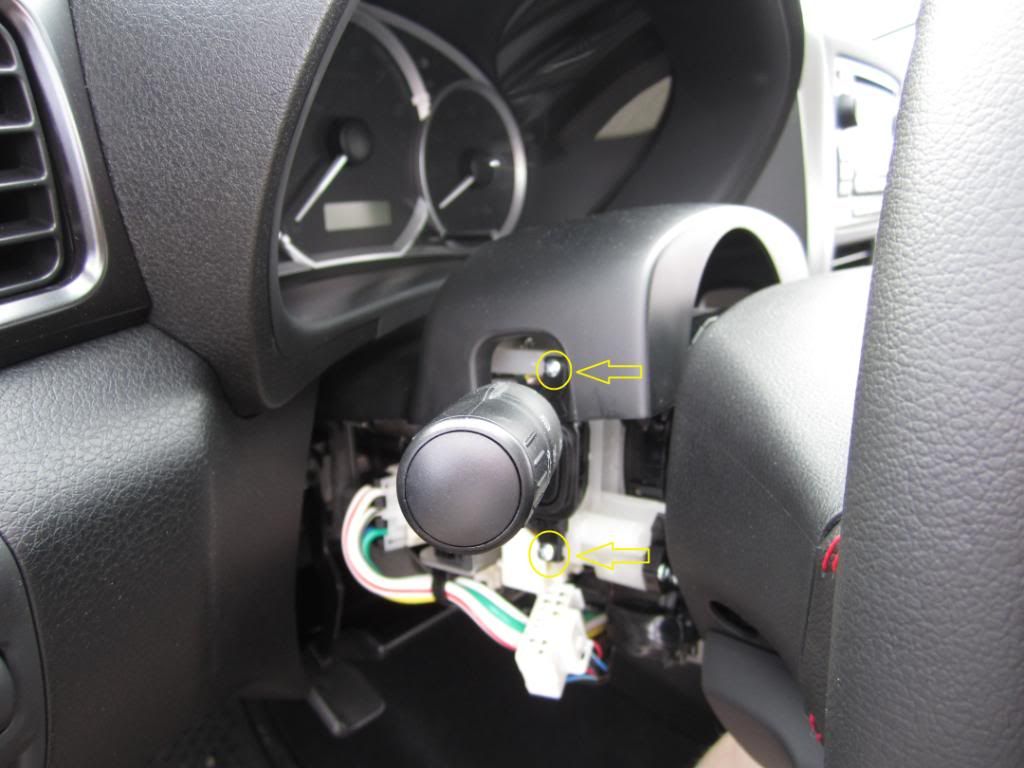
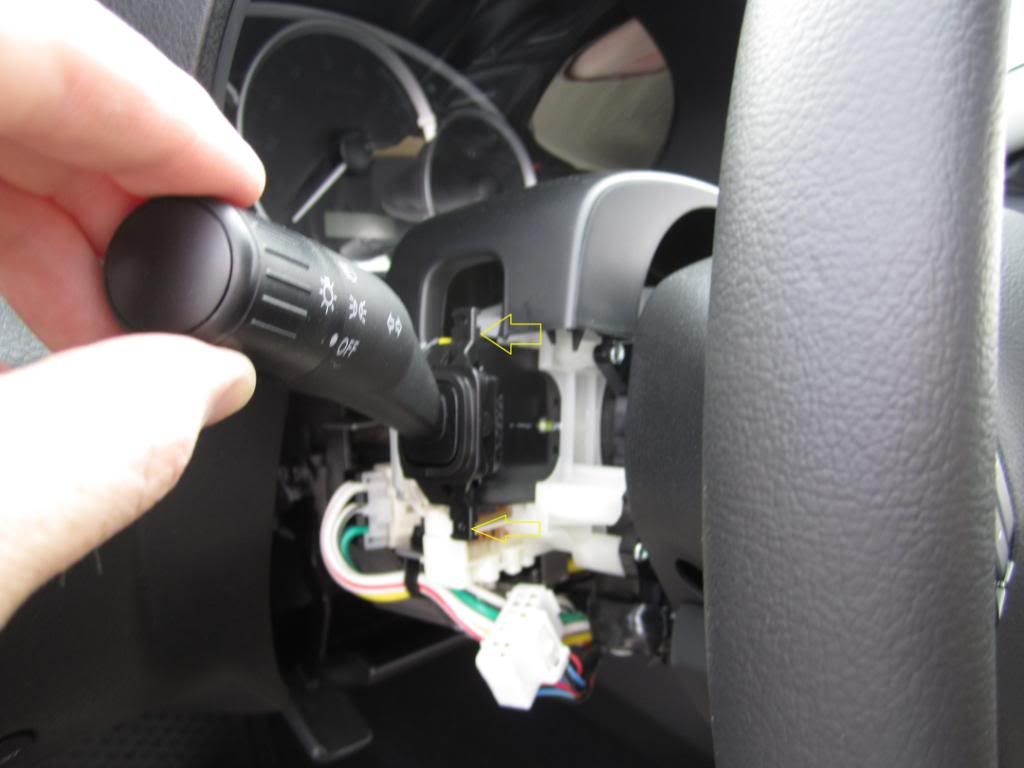
4. Remove the two screws and pull/slide turn signal switch out of receptacle.
![Image]()
![Image]()
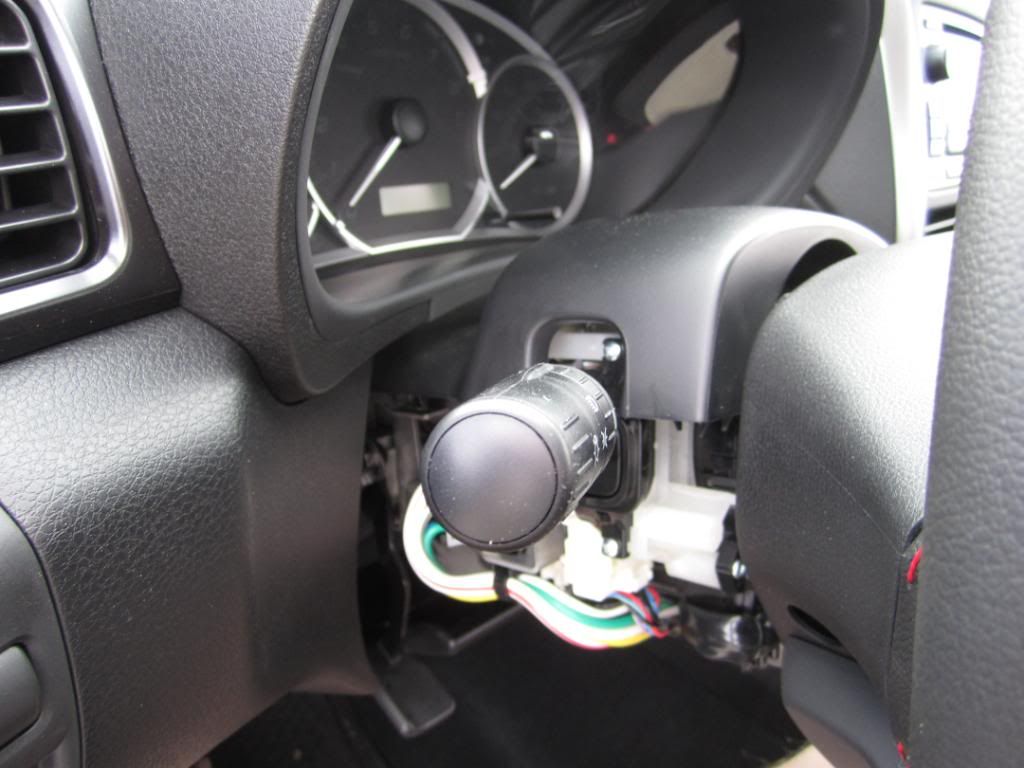
5. Install the provided turn signal switch, tighten screws (do not over tighten) and install plug into new switch. Re-install upper-cover screws and lower wheel hub cover screw. Part 1 complete.
![Image]()
![Image]()
-Part 2- Relay Installation
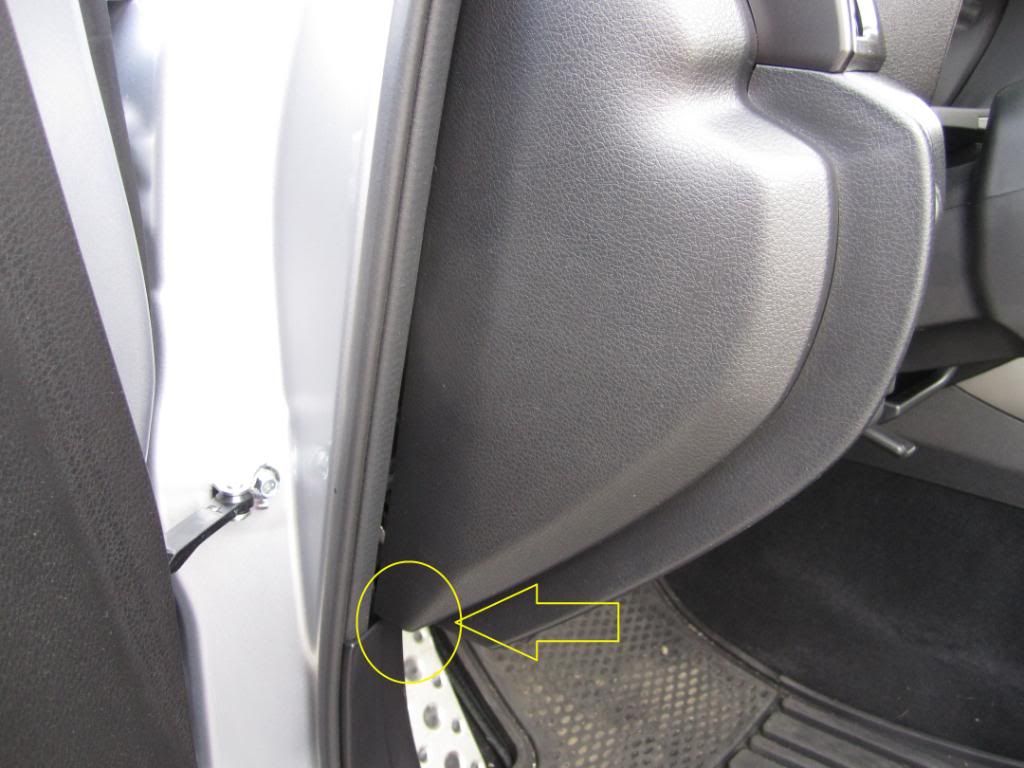
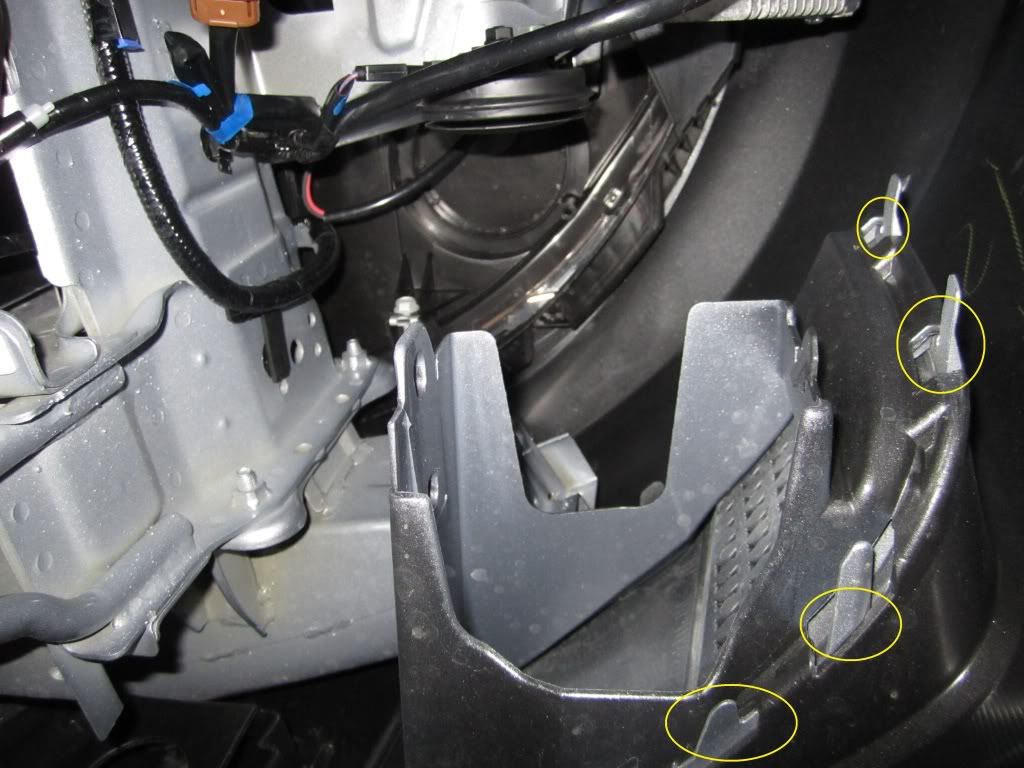
1. For added light remove the side panel. Pull from bottom where marked should pop off easily. Open fuse box door also. Marked is the location of where the supplied Relay will be installed.
![Image]()
![Image]()
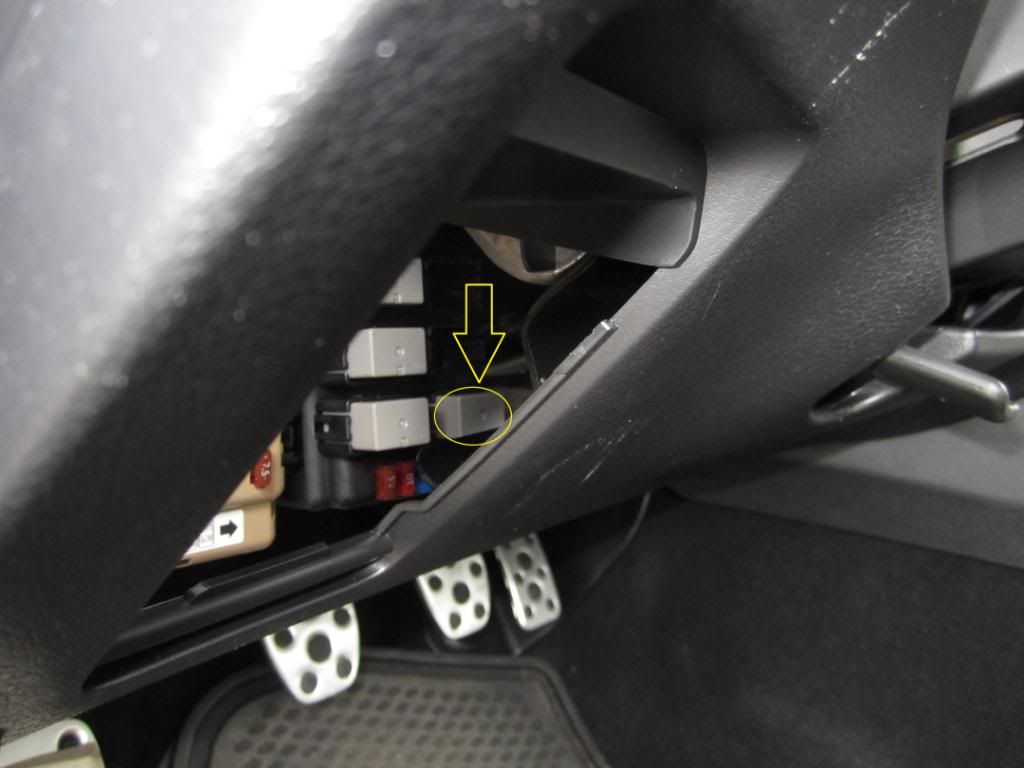
2. Directions in kit say to remove more of the dash panel, I found this unnecessary. Relay can be put in from underneath or through the fuse access door.
![Image]()
3. Close fuse access door and pop back on side dash panel. Part 2 complete.
-Part 3- Fog light installation on to front bumper.
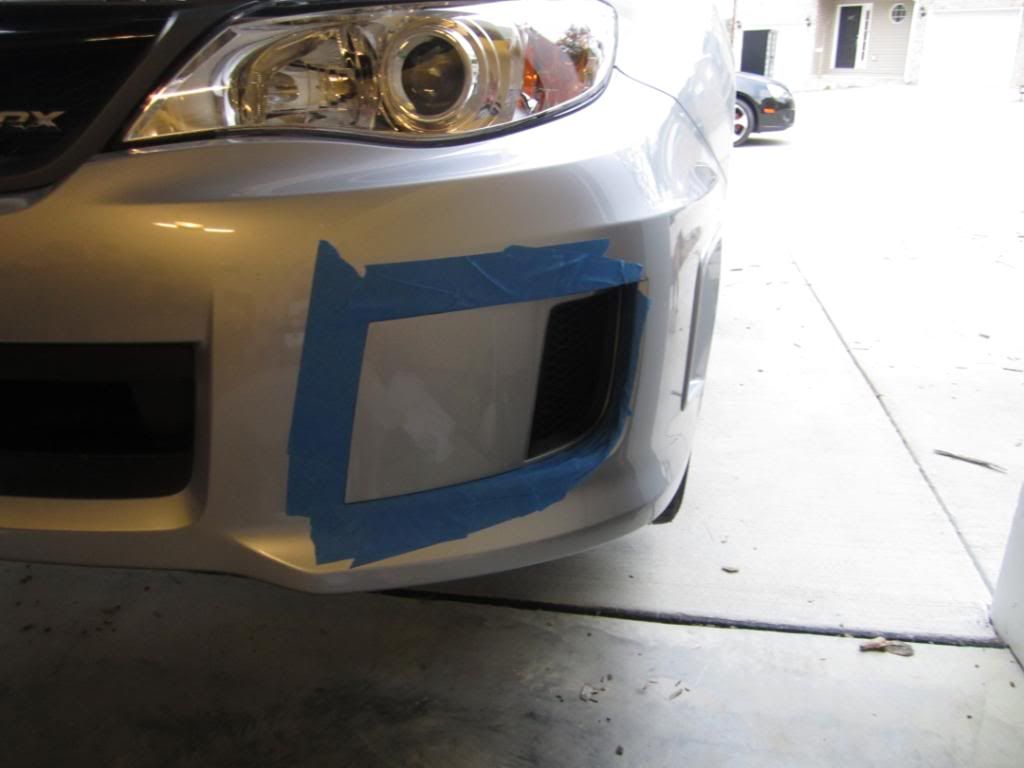
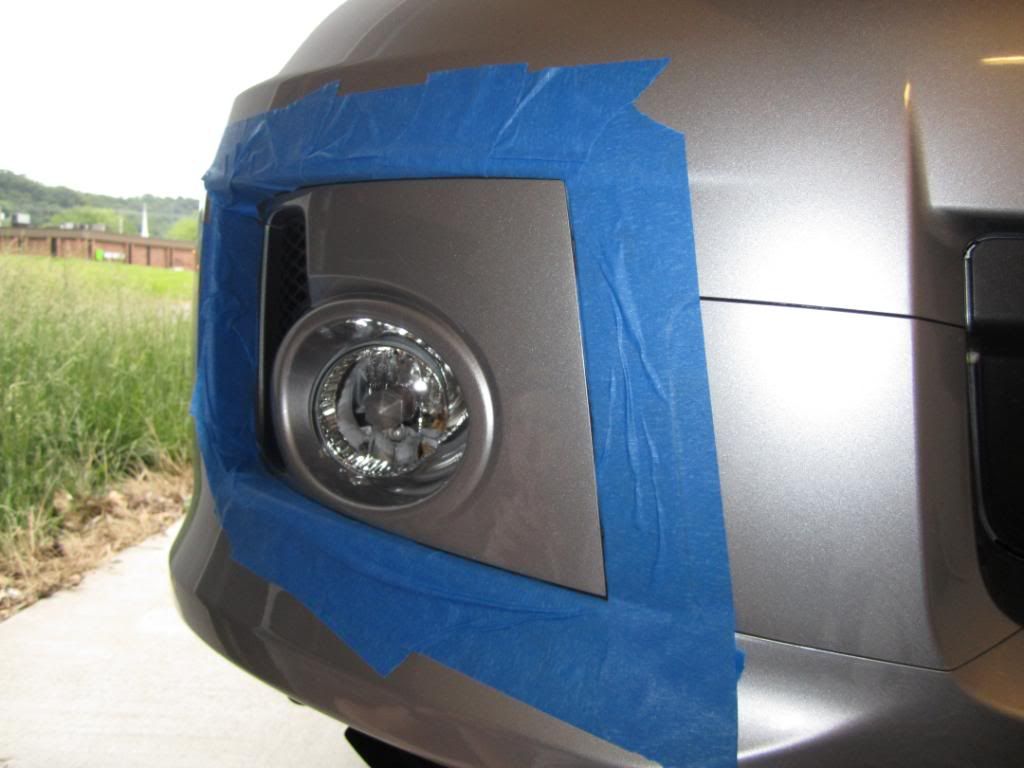
The instructions provided call for the whole front bumper to be removed, i found this not necessary. I also took it upon myself to mask around where the stock panels come off to be sure not scratch existing paint on bumper or the new covers to be installed.
![Image]()
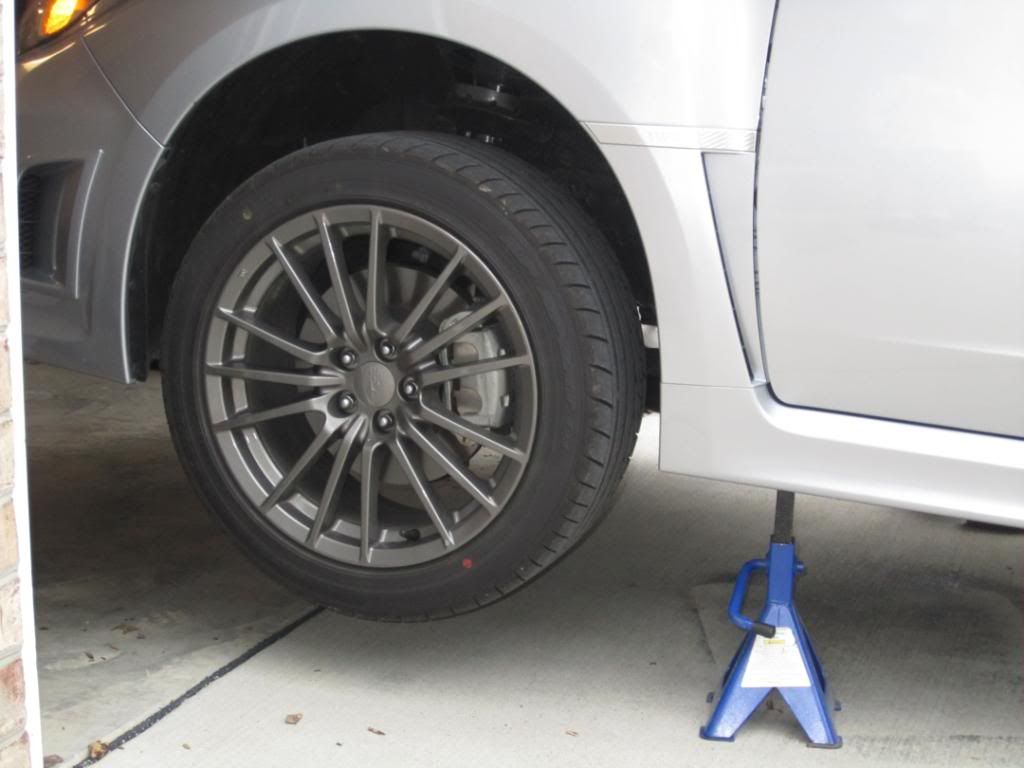
1. Always when working underneath any vehicle you should always use jack-stands.
![Image]()
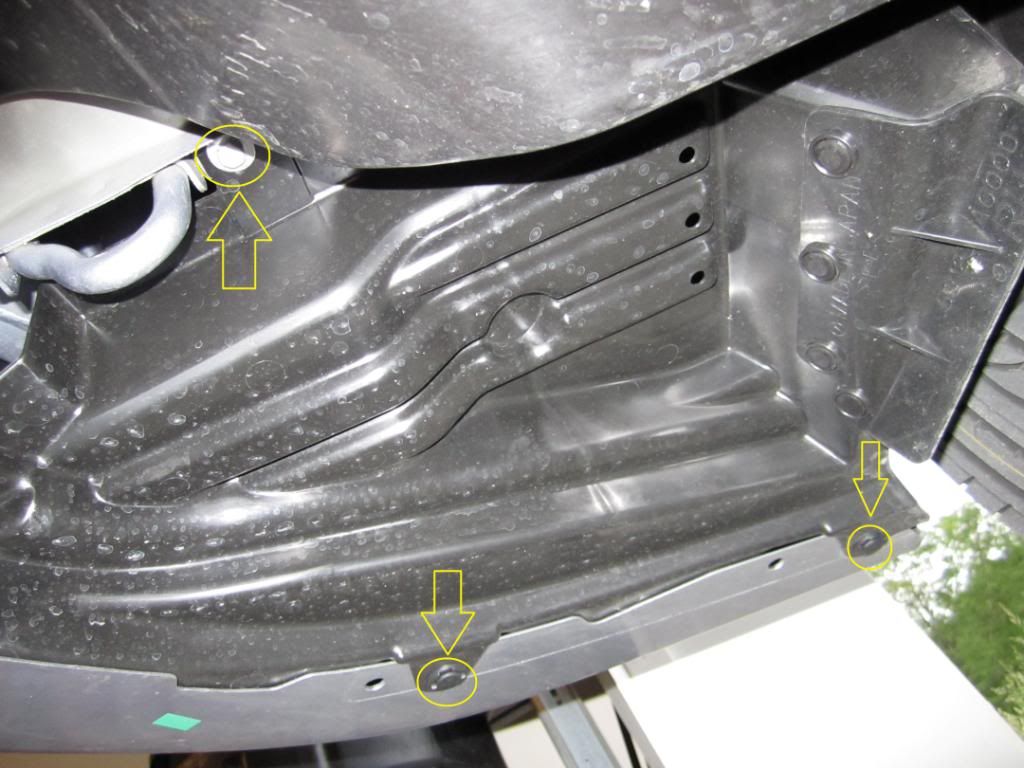
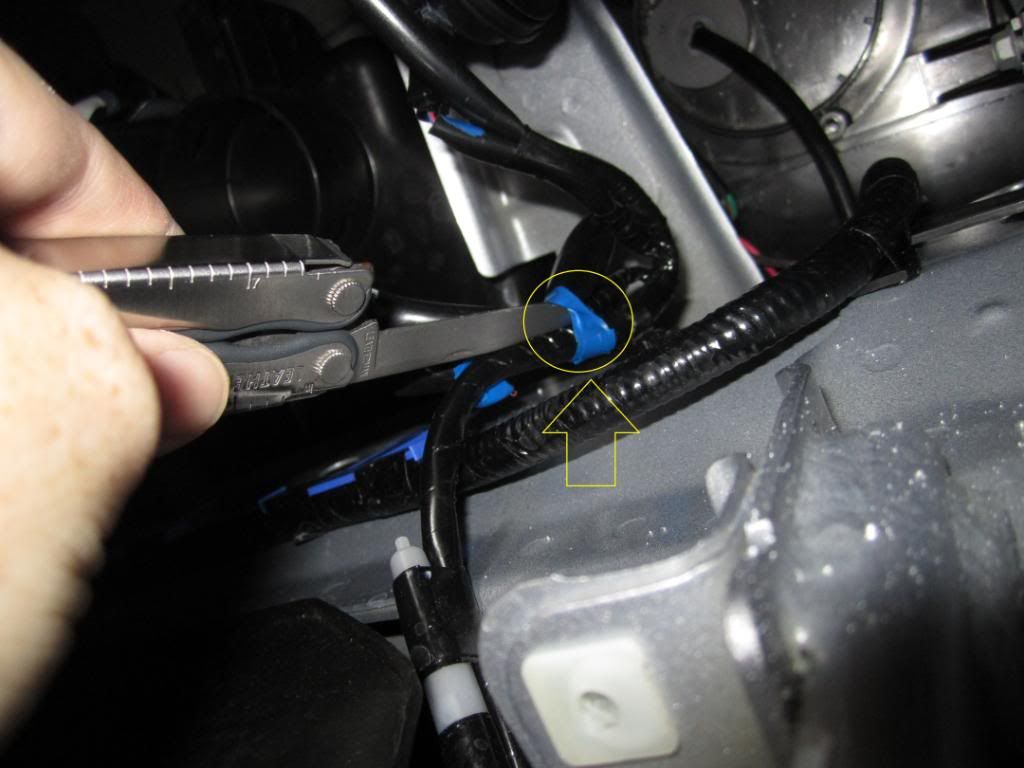
2. Remove the 2 plastic fasteners and the 10mm bolt. For access just pull down the cover. This is same for both sides.
![Image]()
![Image]()
3. The original fog light area covers will have "tabs" to press to get them off. You'll push these out from inside bumper.
![Image]()
![Image]()
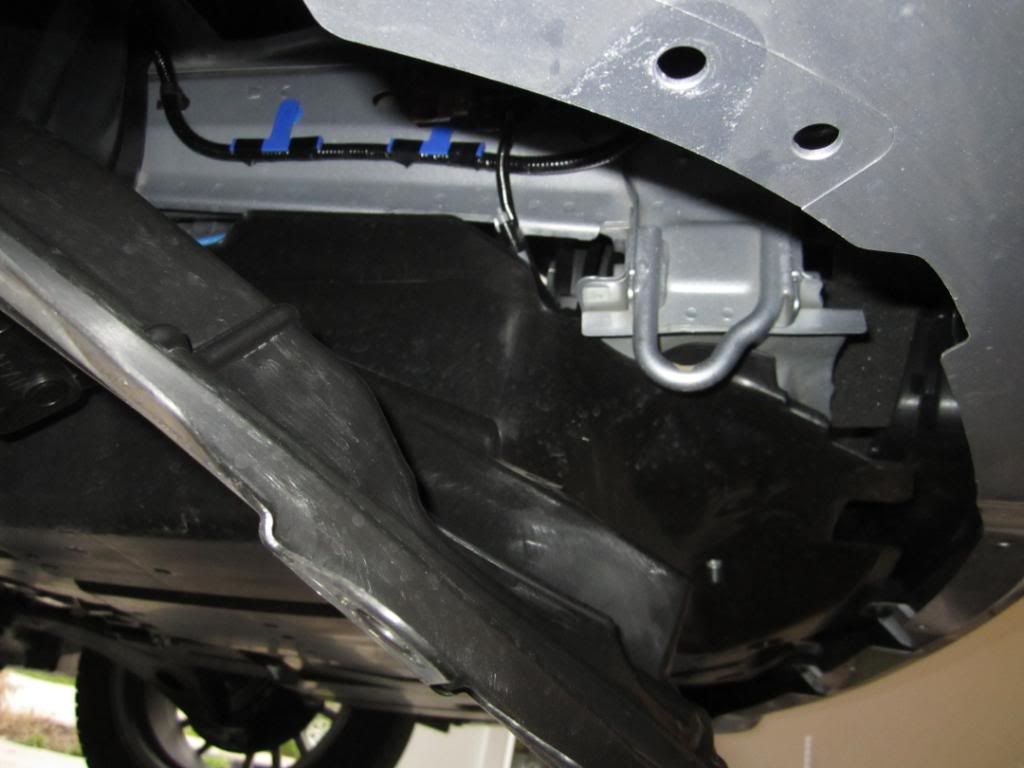
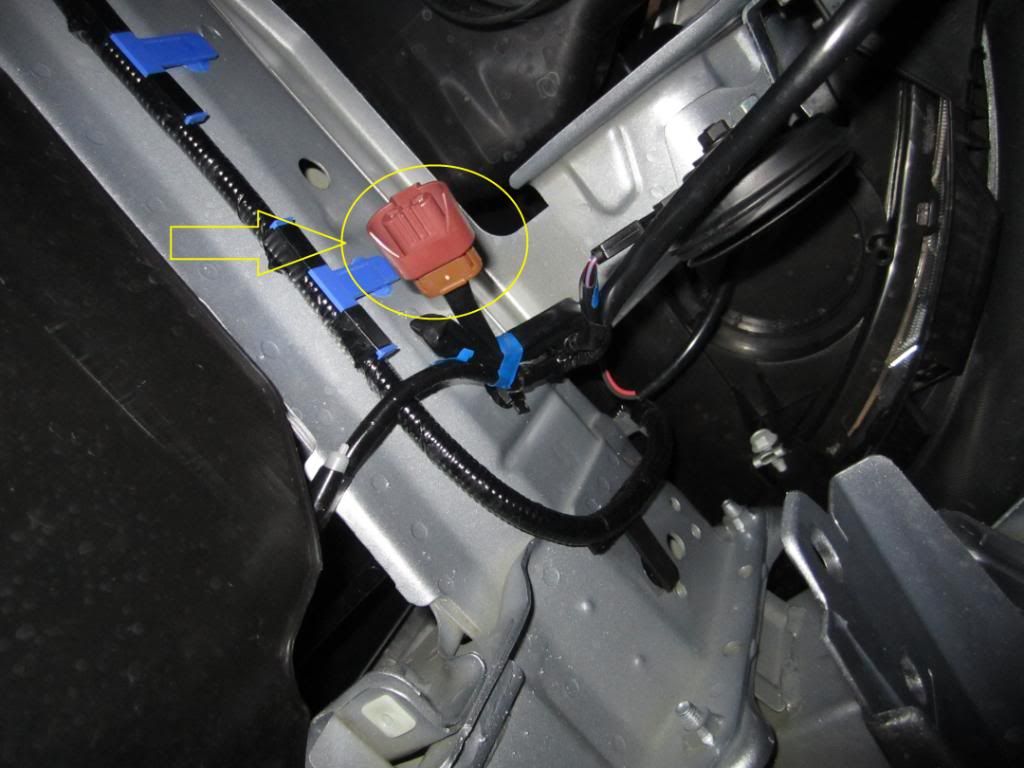
4. Here's your factory harness to plug into your new fog lights. Cut the tape. This is same on both sides.
![Image]()
![Image]()
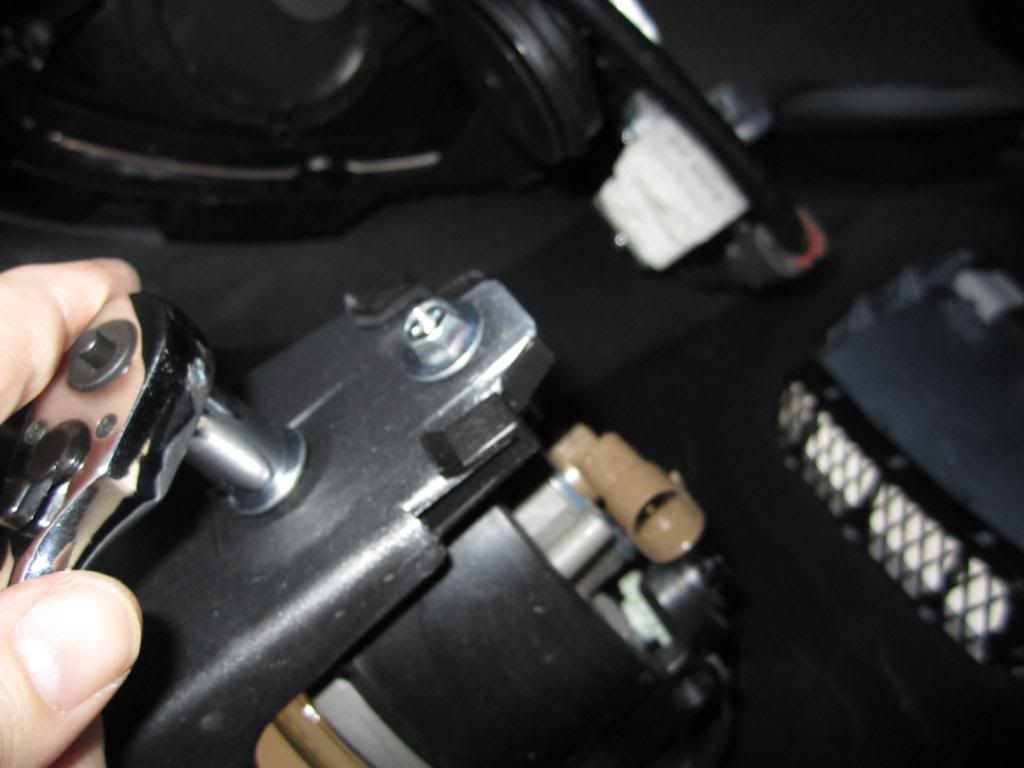
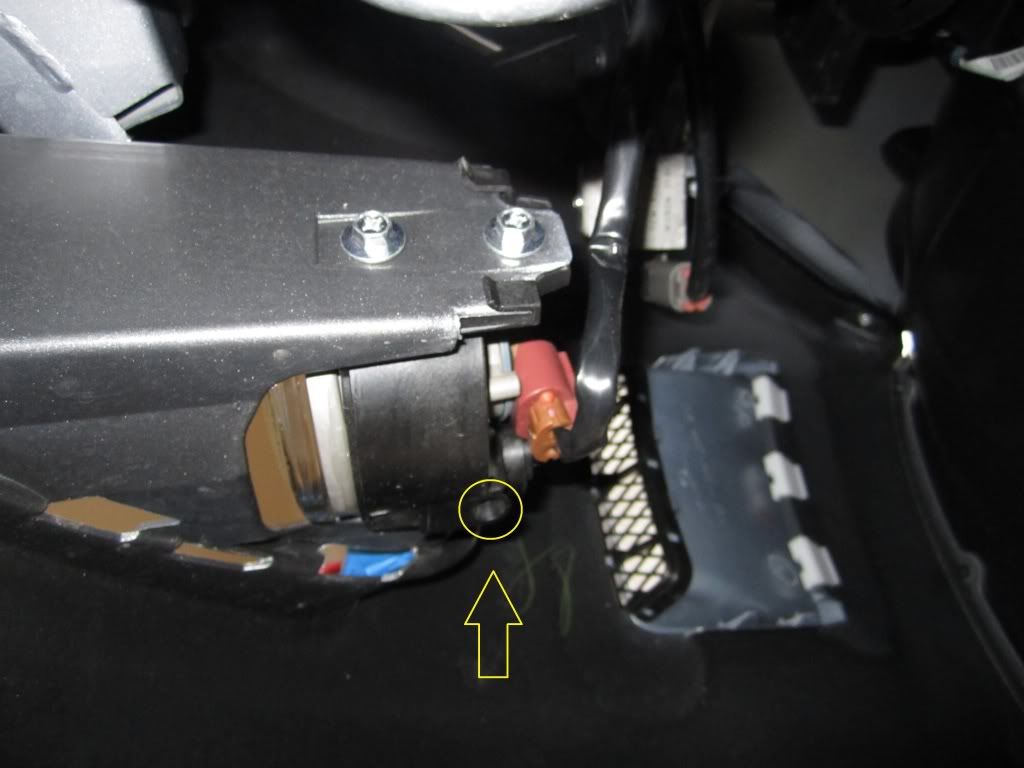
5. Take the new fog light and slide it into existing slot. Easiest way to tell which side is which is to make sure the electrical plug is pointing down toward the ground, under this condition fog lights will only go in one way. This will ensure proper installation. Tighten the provided 10mm bolts. These are easy to over tighten. (I did on 1) So snug will do. Then plug in the harness. Marked is where you can make the beam adjustments with a phillips screwdriver. The provided instructions show correct beam placement. (I used my garage door- You will have to install ground back on battery and take car off of jack stands to do this.)
![Image]()
![Image]()
6. After beam adjustment install the fasteners and 10mm bolts on weather guards under car. Install the new provided fog light covers that will complete the install. I started from the outside and worked my way to the inside its just opposite of how you removed the original fog light cover. Should easily snap on.
![Image]()
7. Remove tape if used.
![Image]()
8. Remove jack stands and lower car to ground. Install ground back on battery. If all is done right should look like this.
![Image]()
Here's the kit shown in ISM. Relay and Replacement Turn Signal Dimmer Switch already were installed when I took this pic.

Here's the tools needed, Phillips, 10mm socket and something to remove plastic fasteners on weather guard are a must, rest is up to you and I added the blue masking tape.
-Part 1- Turn Signal Switch Removal/Installation
1. Remove this screw then remove bottom steering hub cover.
2. Remove these 3 screws (3rd shown in 2nd pic) so you can move the top hub cover out of the way.
3. Remove this plug from original turn signal switch.
4. Remove the two screws and pull/slide turn signal switch out of receptacle.
5. Install the provided turn signal switch, tighten screws (do not over tighten) and install plug into new switch. Re-install upper-cover screws and lower wheel hub cover screw. Part 1 complete.
-Part 2- Relay Installation
1. For added light remove the side panel. Pull from bottom where marked should pop off easily. Open fuse box door also. Marked is the location of where the supplied Relay will be installed.

2. Directions in kit say to remove more of the dash panel, I found this unnecessary. Relay can be put in from underneath or through the fuse access door.
3. Close fuse access door and pop back on side dash panel. Part 2 complete.
-Part 3- Fog light installation on to front bumper.
The instructions provided call for the whole front bumper to be removed, i found this not necessary. I also took it upon myself to mask around where the stock panels come off to be sure not scratch existing paint on bumper or the new covers to be installed.
1. Always when working underneath any vehicle you should always use jack-stands.
2. Remove the 2 plastic fasteners and the 10mm bolt. For access just pull down the cover. This is same for both sides.
3. The original fog light area covers will have "tabs" to press to get them off. You'll push these out from inside bumper.

4. Here's your factory harness to plug into your new fog lights. Cut the tape. This is same on both sides.
5. Take the new fog light and slide it into existing slot. Easiest way to tell which side is which is to make sure the electrical plug is pointing down toward the ground, under this condition fog lights will only go in one way. This will ensure proper installation. Tighten the provided 10mm bolts. These are easy to over tighten. (I did on 1) So snug will do. Then plug in the harness. Marked is where you can make the beam adjustments with a phillips screwdriver. The provided instructions show correct beam placement. (I used my garage door- You will have to install ground back on battery and take car off of jack stands to do this.)
6. After beam adjustment install the fasteners and 10mm bolts on weather guards under car. Install the new provided fog light covers that will complete the install. I started from the outside and worked my way to the inside its just opposite of how you removed the original fog light cover. Should easily snap on.
7. Remove tape if used.
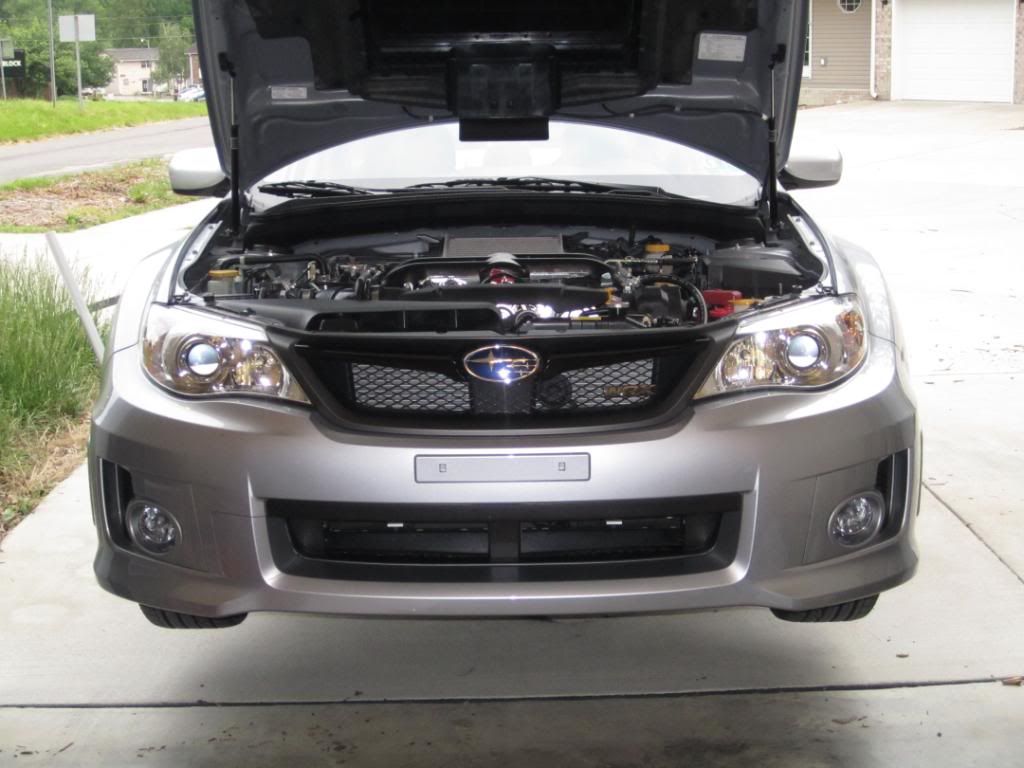
8. Remove jack stands and lower car to ground. Install ground back on battery. If all is done right should look like this.


